If you saw my post of the Little Tree Coasters last week, then you already know I have the heart eyes for all things Rustic!
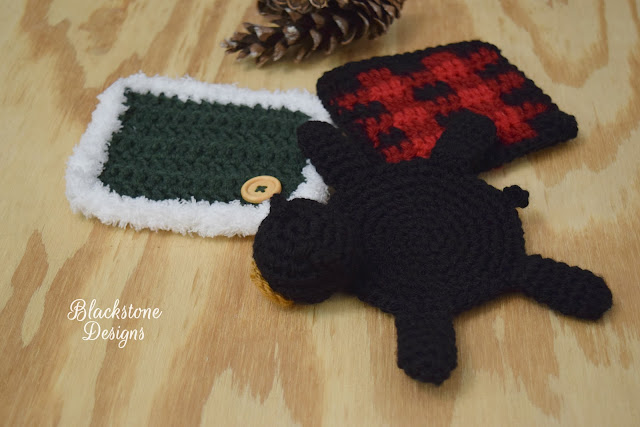
Well, Friday morning I woke up with the cutest idea in my head: Bear Skin Rug coaster!
Disclaimer: This post contains affiliate links
While I was processing how I would make it look, another coaster idea popped in my head: Fur trimmed green square. I jumped right up and got to work!!
But, while I was working on the bear, I thought "Well, I can't have a rustic themed coaster set without a plaid square!", so I originally scrapped the green square idea and replaced it with the plaid.
I took all of my photos of the Bear Skin Mug Rug and the Buffalo Plaid Mug Rug and felt sad that I hadn't made the green square, so I added it in! And I am so glad I did, because I'm really in love with it.
Eventually I will replace the wooden button I used with a tree branch slice button, because that's what I originally envisioned, but I couldn't find any over the weekend (tear). Looks like I'll be making some (my crafty self is not disappointed!)
So, do you want to make your own Rustic Mug Rugs? Get the instructions below:
Rustic Mug Rugs
Get the ad-free PDF on Ravelry
 INSTRUCTIONS ARE SEPARATED OUT - KEEP SCROLLING FOR THE BUFFALO PLAID MUG RUG
Bear Skin Mug Rug
Materials
Worsted Weight Yarn (#4)
Optional Materials
Gauge
Not important for this project
Size
3.5”[8.9cm] Diameter
5.5”[14cm] Nose to Tail
Stitch Guide
arnd = around
ch = chain
sc = single crochet
sl st(s) = slip stitch(es)
st(s) = stitch(es)
Skill Level
Easy
Written in U.S. Terms
Notes
Instructions
BODY
With Black,
1. Magic Ring, ch 1, 6 sc in ring (6)
2. 2 sc arnd (12)
3. *2 sc, sc* arnd (18)
4. *2 sc, sc x 2* arnd (24)
5. *2 sc, sc x 3* arnd (30)
6. *2 sc, sc x 4* arnd (36)
7. *2 sc, sc x 5* arnd (42)
16. *2 sc, sc x 6* arnd (48)
17. sl st x 2, ch 5, sl st to same space, sl st to next space; Fasten. <Tail Created>
HEAD
1. Magic Ring, ch 1, 6 sc in ring (6)
2. 2 sc arnd (12)
3. *2 sc, sc* arnd (18)
4. *2 sc, sc x 2* arnd (24)
5. sc arnd (24)
6. *dec, sc x 2* arnd (18)
7. *dec, sc* arnd (12) - Stuff Head Here
8. dec arnd (6).
Weave tail through remaining sts and pull tight to close. Fasten.
EARS
Attach yarn to any stitch of rnd 2, ch 4, sl st into adjacent st of rnd 3; Fasten.
Repeat on other side (over rnds 2 & 3), so it is even with the first ear.
MUZZLE
With Brown,
1. Magic Ring, ch 1, 4 sc in ring (4)
2. *3 sc, sc* 2X; Fasten. (8)
ARMS/LEGS (Make 4)
1. Magic Ring, ch 1, 4 sc in ring (4)
2. 2 sc arnd (8)
3. sc arnd (8)
4-7. Repeat 3
Finishing
Attach head to side opposite of the tail, so the tail is back center.
Attach muzzle to front of head over rnds 5-7.
Skip 5 sts from the head and attach arms (one of each side).
Skip 5 sts from the arms and attach legs (one of each side).
Hide all strings.
-
 Optional:
Add grip liner to bottom - Lay coaster onto grip liner, trace around
the outside of the coaster, cut it out and trim off ¼” around. Hot glue
to the back of the coaster.
Optional:
Add grip liner to bottom - Lay coaster onto grip liner, trace around
the outside of the coaster, cut it out and trim off ¼” around. Hot glue
to the back of the coaster.
------------------------------------------------------------------------------------------------------------------
Buffalo Plaid Mug Rug
Materials
Worsted Weight Yarn (#4)
Optional Materials
Gauge
Not important for this project
Size
3.5”[8.9cm] Diameter
5.5”[14cm] Nose to Tail
Stitch Guide
arnd = around
ch = chain
dc = double crochet
sc = single crochet
sl st(s) = slip stitch(es)
st(s) = stitch(es)
Skill Level
Easy
Written in U.S. Terms
Notes
Beginning chain 2 counts as a stitch
Pay close attention to color changes
When changing colors: finish your previous stitch by pulling the next color through the last two loops. This provides a clean color change.
For a clean backside: When changing colors make sure to carry the other strand across (work your stitches over it).
This square can also be made in one solid color & trimmed with faux fur. Follow the instructions listed without making color changes.
Asterisks indicate the instructions between them need to be repeated.
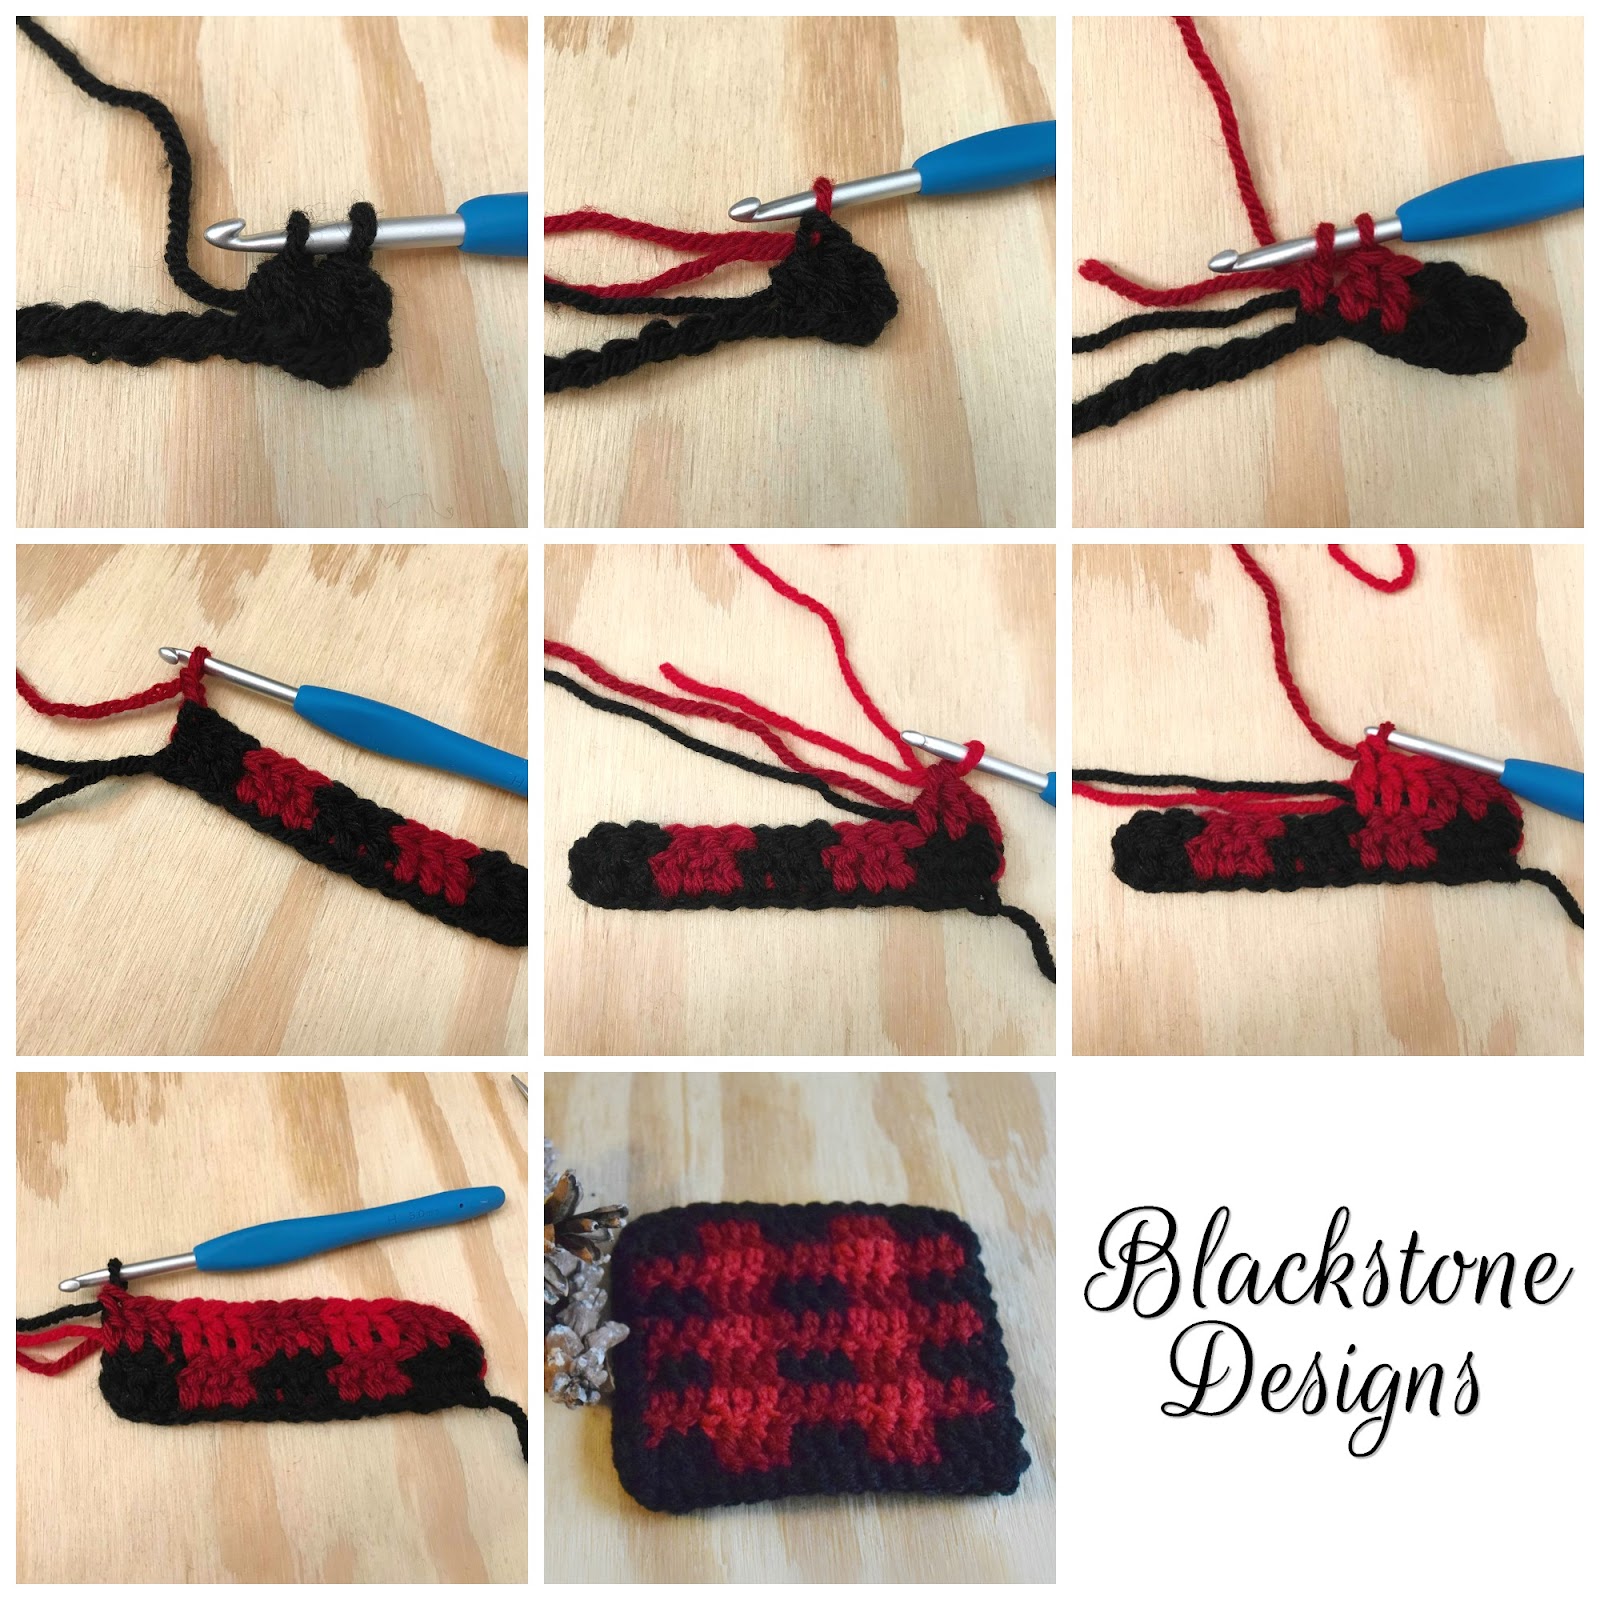
Tutorial photo on the last page.
Buffalo Plaid can be made in any colors of your choosing. For Green: Black, Dark Green, Bright Green. For Blue: Black, Navy, Royal. For Neutral: Black, Gray, White.
Instructions
1. with Black: Ch 16, dc in 3rd ch from hook (skipped chs count as 1st dc), dc in next st, *with Dark Red: dc x 3, with Black: dc x 3* 2X, turn
2. with Dark Red: Ch 2 (counts as 1st dc), dc x 2, *with Bright Red: dc x 3, with Dark Red: dc x 3* 2X, turn
3. with Black: Ch 2 (counts as 1st dc), dc x 2,*with Dark Red: dc x 3, with Black: dc x 3* 2X, turn
4-7. Repeat 2 & 3; at the end of round 3, continue with black and sc evenly arnd the outside, in the end of each row and in each st, putting 2 scs into each corner. Fasten.
Finishing
- Optional: Add grip liner to bottom - Lay coaster onto grip liner, trace around the outside of the coaster, cut it out and trim off ¼” from each side. Hot glue to the back of the coaster.
Do you love this pattern? Let me know what you think in the comments!
I'd love to see your finished projects! Join the Blackstone Designs Crochet Community on Facebook to share your work, get pattern support, and so much more!
Hope to see you there!!
Don't forget to add this pattern to your Ravelry favorites and Pin it for later, so you can always find it!
Written pattern and photographs © 2017 Sonya
Blackstone of Blackstone Designs. Please do not sell, share, or modify
this pattern, but instead share the link to where the pattern can be
found. You may sell items you make with this pattern. This pattern, as
with all Blackstone Designs/Sonya Blackstone patterns, are not for
educational use without written permission from the designer.
Sonya Blackstone is a participant in the Amazon Services LLC Associates Program, an affiliate advertising program designed to provide a means for us to earn fees by linking to Amazon.com and affiliated sites.
Labels: Bear Skin Rug, Black Bear, Blackstone Designs, Buffalo Plaid, Coasters, Crochet, Free Crochet Pattern, home decor, Lumberjack, Maine, Mug Rug, Plaid, Rustic